

Android 4.4.2 KitKat Update: How To Root Samsung Galaxy Note 3 LTE SM-N9005 On The New XXUENB7 Firmware [Tutorial]


Samsung (KRX:005935) recently released the Android 4.4.2 KitKat firmware update -- build XXUENB7 -- for the international LTE variant for the Galaxy Note 3 with the model number SM-N9005. Users who have updated their handsets to the new firmware can now root their devices, which will allow them to flash custom ROMs in future.
Rooting a device allows users to completely utilize the device’s hardware resources and get rid of the limitations associated with stock firmware. After rooting the device, users can do many things with the device, such as accessing system files and using various apps that require root access among others.
Users should note that rooting the Galaxy Note 3 LTE on Android 4.4.2 KitKat XXUENB7 will void the device’s warranty. However, users can regain the warranty by re-installing the official firmware.
Here are some more aspects that users should be aware of before rooting their devices:
- This rooting process is only for the Galaxy Note 3 LTE SM-N9005.
- Proper back-up of all data in the phone is highly recommended before rooting the device.
- The device should have at least an 80 percent charge left on the battery.
- USB drivers must be installed in the computer with USB Debugging enabled on the device.
- The Galaxy Note 3 must be running on the official XXUENB7 Android 4.4.2 KitKat firmware.
Note: International Business Times cannot be held responsible for anything that goes wrong. Users should proceed at their own risk.
Tutorial
Step 1: Download both CF-Auto-Root Android 4.4.2 Package and Odin v3.09.
Step 2: Extract the CF-Root zip file (you will get a .tar.md5 file) and the Odin zip file (you will get Odin3 v3.0.9.exe file) to the computer.
Step 3: Power off the phone and put it in Download mode by pressing and holding down the Volume Down, Home and Power buttons together. After a warning screen appears, press the Volume Up button to enter Download mode.
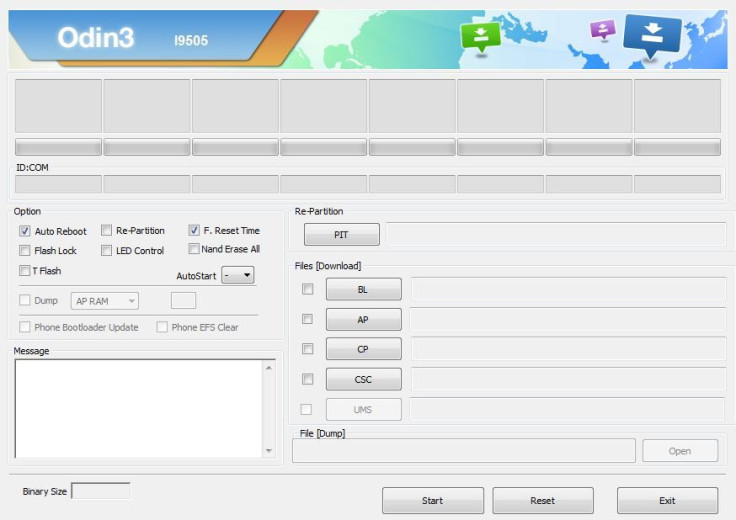
Step 4: Run Odin3 v3.09.exe as an Administrator, and connect the Galaxy Note 3 to the PC via USB cable. If connected properly, a message showing “Added!!” will appear in Odin’s message box. If the message does not appear, try a different USB port, or reinstall the driver.
Step 5: Click on the AP button, and select the CF-Auto-Root-hlte-hltexx-smn9005.tar.md5 file that was extracted in Step 1.
Step 6: In Odin, check the “Auto Reboot” and “F. Reset Time” options.
Step 6: Now, click on the Start button in Odin.
Step 7: Once the flashing process is complete, the Galaxy Note 3 will restart automatically and a PASS message with green background will appear in the left-most box at the top of Odin.
The handset can now be disconnected from the PC, and it will be rooted on N9005XXUENB7 Android 4.4.2 KitKat firmware.
[Source: True Android]
© Copyright IBTimes 2025. All rights reserved.
- MOST POPULAR IN Technology


