How To Install Android 4.2.1 Jelly Bean On Verizon Samsung Galaxy Nexus (SCH-I515) Using AOKP Custom ROM [Tutorial]
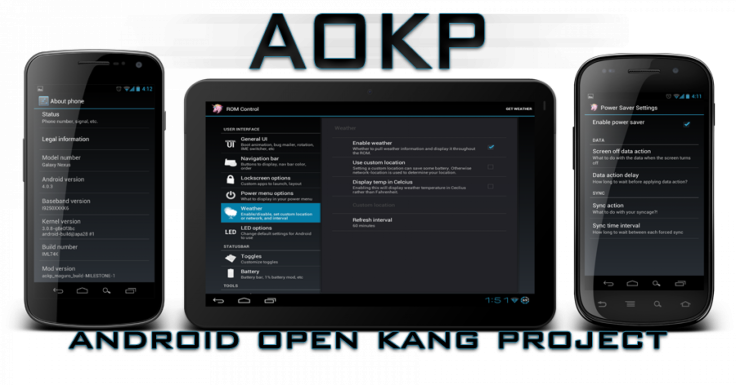
The Verizon variant of the Samsung Galaxy Nexus smartphone with the model number SCH-I515 recently started receiving the new AOKP (Android Open Kang Project) custom ROM “JB-MR1 Build 1,” based on Android 4.2.1 Jelly Bean. Users of the Verizon Galaxy Nexus (SCH-I515) will be able to upgrade their device to the latest firmware by installing AOKP Custom ROM on it.

The Android 4.2.1 Jelly Bean firmware update comes with exciting new features such as multi-user support, gesture typing, new quick settings option, lock-screen widget, new camera app and photo sphere. The features also include improved Google Now, new daydream feature and miracast display, to name a few.
According to an Android Jinn report, the AOKP JB-MR1 Build 1 based on Android 4.2.1 Jelly Bean is currently in the development phase and, therefore, may contain bugs. However, further progress with the development is expected to resolve all the issues.
The report also listed out some key features of the AOKP JB-MR1 Build 1 Android 4.2.1 Jelly Bean ROM:
General UI
- Custom boot animation
- Custom carrier label
- Notification background
- Statusbar brightness slider
- Recents RAM Bar and Kill All button
- Power menu options
Lockscreen
- Customizable text color
- Volume wake and music controls
- Allow any kind and unlimited number of widgets (new)
Navigation Bar
- Fully customizable NavBar (buttons, color, transparency, widgets, etc.)
- Menu arrow keys while typing (new)
- Customizable NavBar Ring
Statusbar
- Battery indicator styles
- Clock styles
- Signal styles
- Statusbar transparency (new)
- Customizable Statusbar Toggles (new, based on Google’s tiles)
LED Control
Custom Vibrations
Sound Settings
- Less frequent notification sounds
- Headphone action
- BT connect action
- Flip action
- Quiet Hours (CM)
- Disable safe headset volume warning (new)
Theme support (multi-user support still buggy, use at your own risk)
NFC Polling modes
Below is a tutorial showing how to install AOKP JB-MR1 Build 1 Android 4.2.1 Jelly Bean custom ROM on the Verizon variant of the Samsung Galaxy Nexus (SCH-I515). But before you proceed, here are some vital aspects to keep in mind.
- Keep proper backups of your data
- Backup the EFS Folder
- The device must have at least 80 percent battery power
- The computer must have USB Driver installed for the Galaxy Nexus
- USB Debugging must be enabled
- ClockworkMod Recovery must be installed on the device
The following installation process involves performing a Nandroid backup. Users are recommended not to skip this step as it’s very helpful if AOKP JB-MR1 Build 1 Android 4.2.1 Jelly Bean custom ROM doesn’t work as expected.
In addition, users should note that IBTimes cannot be held responsible if anything goes wrong. They should proceed at their own risk.
Steps To Follow
Step 1: Download AOKP JB-MR1 Build 1 4.2.1 Jelly Bean ROM for Galaxy Nexus SCH-I515 (Filename: aokp_toro_jb-mr1_build-1.zip).
Step 2: Download Google Apps (Filename: gapps-jb-20121212-signed.zip).
Step 3: Connect Samsung Galaxy Nexus to PC via USB.
Step 4: Copy all downloaded zip files to the SD card of your phone. But don’t extract any file.
Step 5: Disconnect USB and turn off your phone.
Step 6: Boot into ClockworkMod (CWM) recovery in your Galaxy Nexus by pressing and holding Volume Up, Home and Power button together until the screen flashes.
Step 7: Release all three buttons for half a second and hold them again. You will see ClockworkMod recovery screen. Use Volume keys to browse between options in recovery while using Power key to select an option.
Step 8: Perform a Nandroid backup of your existing ROM. To do that, select Backup and Restore, then on the next screen, select Backup again. Go back to the main recovery menu after backup is complete.
Step 9: Perform the data wiping task. To do so, select wipe data/ factory reset, then select Yes on next screen to confirm your action. Wait till the data wipe is completed.
Step 10: Come back to CWM recovery main menu and select wipe cache partition. Once wiping is done, select Wipe Dalvik Cache under advance option to perform Dalvik cache wiping.
Step 11: Select install zip from sdcard and then select choose zip from sdcard. Then, locate the aokp_toro_jb-mr1_build-1.zip file and select it by pressing the Power button.
Step 12: Confirm installation by selecting Yes – Install _____.zip on the next screen. The ROM installation will begin.
Step 13: Once the installation process ends, repeat step 11. But this time, choose gapps-jb-20121212-signed.zip instead of ROM zip to install the Google apps package.
Step 14: When the installation is complete, go back to the main recovery menu and select Reboot System Now to reboot the device and boot up into the customized Android 4.2.1 Jelly Bean ROM AOKP JB-MR1 Build 1. The first boot will take time.
[Source: XDA Developers, Android Jinn]
© Copyright IBTimes 2025. All rights reserved.


