

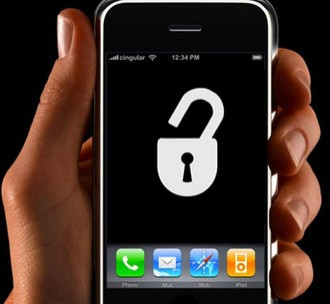
Apple iOS 5.1 Jailbreak: How To Unlock iPhone 4S, iPad 2, A5, A4 Devices [COMPLETE TUTORIAL]
Apple iOS 5.1 is one of the most popular mobile operating systems on the planet, but its permitted functions haven't been enough to satisfy some users. Many people using iOS 5.1-based iPhones, such as the iPhone 4S, and iPads, such as the iPad 2, have been frustrated by the limitations imposed by Apple. The only way to remove the limitations is through a method called jailbreaking.
Jailbreaking an iPhone 4S, iPad 2 or any other A5 device can be done by using custom kernels on your device. That's also true for any older devices using A4 chips. While the process may void the warranty of your beloved Apple device, it will also allow you to perform banned tasks on the iPhone such as downloading applications not licensed by the Apple App Store. It will also allow your device to perform NFC functions that have not been enabled by Apple or your data service provider.
There are several ways to jailbreak an iPhone 4S, iPad 2 or any other A5 device, but in this tutorial, we'll be teaching you how to use Cydia. Before beginning this process we would like to emphasize that this could ruin you Apple device. Please jailbreak your iPhone, iPad or iPod at your own risk.
This unlocking method should work for all iOS 5.1 gadgets. Please be patient during each step of the jailbreaking process. Many of the steps included in this tutorial could take several minutes to complete. Give your iOS 5.1 device some time to install all of the updates during each step in this process.
Step One: Download iTunes 10.6 and connect your device to your computer.
Step Two: Open iTunes and back up your device.
Step Three: Update your firmware to iOS 5.1. It can be downloaded directly from Apple Support Downloads.
Step Four: After updating your device to iOS 5.1, download the latest version of Redsn0w (Windows/Mac).
Step Five: Open Redsn0w, select Jailbreak and then Install Cydia. The software will guide you through how to turn your device into device firmware update (DFU) mode.
Step Six: After Cydia has been installed on your phone, it will reboot. Once again, turn DFU mode on and keep your phone connected to your computer. Open Redsn0w again, and, this time, choose Just Boot.
Step Seven: Boot Cydia from your iPhone. The app will bring you through a small series of directions to finish the process.
You can see a video of the steps up to this point of the process by visiting this link.
Step Eight: Tap Cydia to launch it from your device.
Step Nine: After Cydia opened, choose manage at the bottom of the screen. (It should be between changes and search.)
Step Ten: Press Sources. (The description says List current sources and add custom ones you may know.)
Step Eleven: From the Sources menu, choose Edit in the top-right corner.
Step Twelve: From the Edit menu, choose Add in the top-left corner.
Step Thirteen: A menu will pop up that prompts you to Enter Cydia/APT URL. Enter this: http://repo.bingner.com then click Add Source.
Step Fourteen: Allow the device to complete the function, and after it's done, click the large Return to Cydia button.
Step Fifteen: Within Cydia>Manage>Sources, choose Bingner, which has just been added to the list.
Step Sixteen: Choose SAM from the list of packages. (the choice is described as subscriber artificial module activates any...).
Step Seventeen: From the SAM menu, choose Install in the top-right corner of the screen.
Step Eighteen: Choose Confirm in the top-right part of the screen.
Step Nineteen: Allow the installation to finish. After it has finished, choose the large button that says Reload SpringBoard.
Step Twenty: Insert your new SIM card into the device. From the home menu of your device, choose the SAMPrefs app.
Step Twenty-One: Choose Utilities.
Step Twenty-Two: Select De-Activate iPhone. Your activiation state under more Information will now show up as Unactivated. If the option De-Activate iPhone is not available, you can use De-Activate iPhone (clear push), which is listed under Push Utils.
Step Twenty-Three: With SAM enabled, tap Method and then By Country and Carrier.
Step Twenty-Four: Tap Country and choose country of your original SIM Card (the one you removed).
Step Twenty-Five: Tap Carrier and choose the original carrier that you device has been locked to.
Step Twenty-Six: Some carriers operate on more than one carrier ID. For those, you may need to choose SIM ID. If you're unable to activate your phone in the previous step, you've likely selected the wrong SIM ID. Change it and retry.
Step Twenty-Seven: Tap More Information and copy the IMSI numbers under SAM Details and copy them to the clipboard.
Step Twenty-Eight: Tap Spoof Real SIM to SAM.
Step Twenty-Nine: From the SAM screen, paste the IMSI numbers from you clipboard into the field IMSI.
Step Thirty: Connect your device (iPhone 4S or iPad 2) to your computer with ITunes installed. Allow iTunes to reactivate your phone. Double click Phone Number field on the device's main screen and make sure that the ICCID matches the one on your SIM Card. If it does not, go back to Step Twenty.
Step Thirty-One: Unplug our device and close iTunes.
Step Thirty-Two: Open SAMPrefs from the home screen of your device and disable it using the Enabled switch (i.e. -- under Subscriber Artificial Module, switch your device from enabled to disabled.)
Step Thirty-Three: Connect your device (iPhone 4S or iPad 2) to the computer with iTunes on it. Launch iTunes. You'll receive an error that says your phone cannot be activated. Just close the program and open it again.
Step Thirty-Four: Give your device few minutes and in a short amount of time, you should see signal bars. That means that your iOS 5.1 jailbreak has officially worked.
Step Thirty-Five: You should backup you iPhone unlock ticket in case the method of jailbreaking the phone becomes blocked. You can get instructions on how to backup the unlock ticket here, at iClarified.
EXTRAS
At this point, your device (iPhone 4S or iPad 2) will only work normally with the SIM card you've inserted during the process and only that SIM card. You've essentially tricked iTunes into thinking that the ICCID is one of the original carrier's. The phone can be rebooted and connected to iTunes without losing your unlock.
If push notifications stop after you've unlocked your phone, you can restore them with the Clear Push function in the SAM menu, followed by connecting it to iTunes.
Happy unlocking!
© Copyright IBTimes 2025. All rights reserved.
- MOST POPULAR IN Technology


