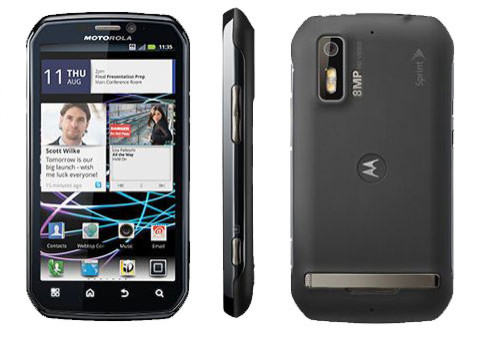
How To Install Android 4.1.2 Jelly Bean On Motorola Photon 4G Using Custom Firmware [Tutorial]

It has been reported that Motorola Photon 4G won’t get Android 4.1 Jelly Bean update officially. But that doesn’t mean that the users of the smartphone won’t be able to experience the new firmware update on their devices. Thanks to the talented minds of the Android developer community, the users of Motorola Photon 4G can now update their devices to the latest Android 4.1.2 Jelly Bean with the help of a custom ROM.
Android Jinn reported that MIUIAndroid is the custom ROM to install Android 4.1.2 Jelly Bean into the Motorola Photon 4G. It brings Jelly Bean features such as the smooth interface, improved notifications, advanced voice recognition service, smarter keyboard, offline voice typing, Google Now and more to the Motorola smartphone. It should be noted here that Motorola Photon 4G, with a dual-core 1 GHz Cortex-A9 processor and 1GB of RAM, is competent enough to run Android 4.1.2 Jelly Bean smoothly.
In addition, since the MIUIAndroid ROM is built using MIUI Version: 2.12.7 and AOKP Milestone 1 FINAL, the users will get a lot of customization options.
Below is the tutorial to install Android 4.1.2 Jelly Bean on Motorola Photon 4G using custom ROM MIUIAndroid developed by XDA Developers member Th3Bill. But there are some prerequisites that users need to know:
- This tutorial is meant only for Motorola Photon 4G. Don’t try this method in any other Android device.
- Backup your data so that you can recover if you lose any.
- Ensure that the device has at least 80 percent battery power.
- USB driver must be installed for Motorola Photon 4G in your PC.
- USB Debugging must be enabled.
- Make sure that your device is rooted and has ClockworkMod Recovery Installed.
- Don’t skip Nandroid backup as it’s very helpful if this custom ROM doesn’t work the way you wanted.
- The users must note that IBTimes cannot be held responsible if anything goes wrong. They should proceed at their own risk.
Files Needed
- Aroma-Prep [Filename: Aroma_Prep.zip]
- MIUIAndroid for Motorola Photon 4G [Filename: MIUIAndroid_Sunfire_2.12.14.zip]
- Google Apps [Filename: gapps-jb-20121011-signed.zip]
Procedure
Step 1: Connect your Motorola Photon 4G to PC via USB.
Step 2: Copy all downloaded zip files to the SD card of your phone. But don’t extract any file.
Step 3: Disconnect USB and turn off your phone.
Step 4: Now boot into recovery. To do so, first press and hold Volume Down button and the Power button on the back until you see the text Fastboot appear in the top left corner of the screen.
After that, use the Volume Down button to scroll through all the options until you reach Android Recovery. Now, press Volume Up button and you will be soon in CWM recovery screen. Once you are in recovery mode, use the Volume keys to scroll through options and Power button to select an option.
Step 5: Perform a Nandroid backup of your existing ROM. To do that, select Backup and Restore, then on the next screen, select Backup again. Go back to the main recovery menu after backup is complete.
Step 6: Perform data wiping task. To do so, select wipe data/factory reset, then select Yes on next screen to confirm your action. Wait for a few minutes till the data wipe is completed.
Step 7: Select install zip from sdcard, then select choose zip from sdcard. After that, locate the Aroma_Prep.zip that you copied earlier in Step 2 and select it by pressing Power button (tap on it if using touch version).
Confirm the installation by selecting Yes – Install _____.zip on the next screen. The Aroma-Prep file installation will begin. Once completed go to Advanced Menu, Select Report Error, Show Log, Reboot Recovery.
Step 8: After the installation process ends, repeat step 7. But choose MIUIAndroid_Sunfire_2.12.14.zip instead of ROM zip to install the ROM. The Aroma installation screen will pop-up. Choose wipe type and options. When it finishes installing, UN-CHECK the “Reboot Now” Box and click Next.
Step 9: Manually reboot your phone to recovery mode and in CWM recovery follow the below steps.
Step 10: Repeat step 7 but choose gapps-jb-20121011-signed.zip instead of ROM zip to install the Google apps package.
Step 11: After the installation is complete, go back to the main recovery menu and select reboot system now to reboot the smartphone and boot up into customized Jelly Bean ROM MIUIAndroid. The first boot will take time.
Step 12: If you want to go back to the previous ROM, boot into recovery, select backup and restore then restore your previous ROM by selecting it from the list.
[Source: Android Jinn]
© Copyright IBTimes 2024. All rights reserved.


