‘Risk Of Rain 2': Tips On How To Beat The Final Boss
KEY POINTS
- The final boss can deal extreme amounts of damage in one hit
- Items that increase maximum HP is enough to survive most of the boss' attacks
- The boss' HP will increase the longer the fight goes on
Successfully escaping via drop ship in “Risk of Rain 2” is required for many of the game’s unlockables and achievements, but considering how the difficulty scales over time, this is easier said than done.
Players will not only need to work fast without sacrificing too many items to reach the final area, but they’ll also need to square off against a challenging boss monster in a final showdown that can easily lead to a failed run. Most of the time, players will only have one shot at winning against this boss, so it’s best to come prepared with all the knowledge required to beat him as soon as the music starts playing.
After finding the teleporter in the Sky Meadow, players will find themselves in Commencement, a weird alien complex on the moon that’s filled with strange, hostile machines. Follow the beacons of light shooting towards the sky and activate four pillars to enable the elevator to the boss room.
Keep in mind there will be no chests in this level except for Lunar Pods and item sacrificing stations. Be sure to be well-equipped before teleporting out of the Sky Meadow.
Upon reaching the boss room, the fight against Mithrix will begin. This boss only has a handful of attacks, but he moves at breakneck speeds and hits like a truck. Staying airborne via Hopoo Feathers or other hover effects is very helpful in this fight.
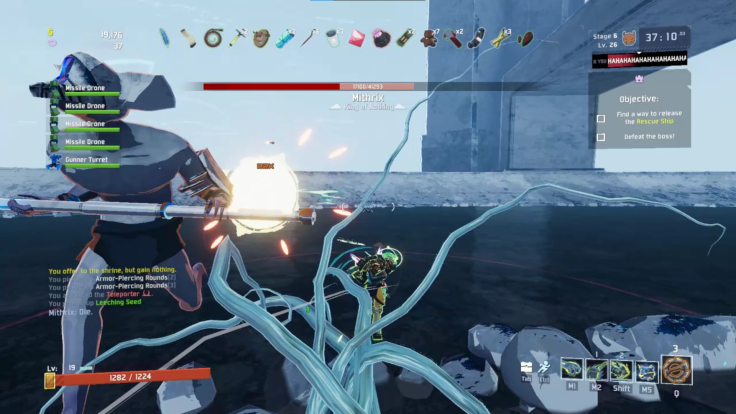
Occasionally, Mithrix will jump up and crash down into the center of the arena, causing a shockwave to burst outward. Jump over the wave but make sure not to dump important cooldowns on him after he lands since he gains massive damage reduction for a short duration after landing.
Depleting his health will trigger a fight against a wave of Chimeras. Finish them off to bring Mithrix back.
Next, he will begin fighting more fiercely. His hammer slams will send shockwaves forward from the point of impact, and some extra Chimeras will be on the field as well. If players have on-kill items like Ceremonial Dagger or Gasoline, taking out the smaller enemies may be better than fighting Mithrix himself.
The boss will begin sending linear, rotating shockwaves that can kill players in one or two hits. This can be easily avoided by staying close to Mithrix while he’s casting or by staying very far away and moving toward the direction of the current rotation.
In the last phase, Mithrix will steal all of the player’s items. However, this is mostly a gimmick, as all items will be returned after draining his HP for the last time.
Once Mithrix is defeated, jump into one of the portals and rush back to the ship. Hold the fort for a few minutes until the victory cutscene shows and the credits start rolling.
© Copyright IBTimes 2026. All rights reserved.
- MOST POPULAR IN Technology